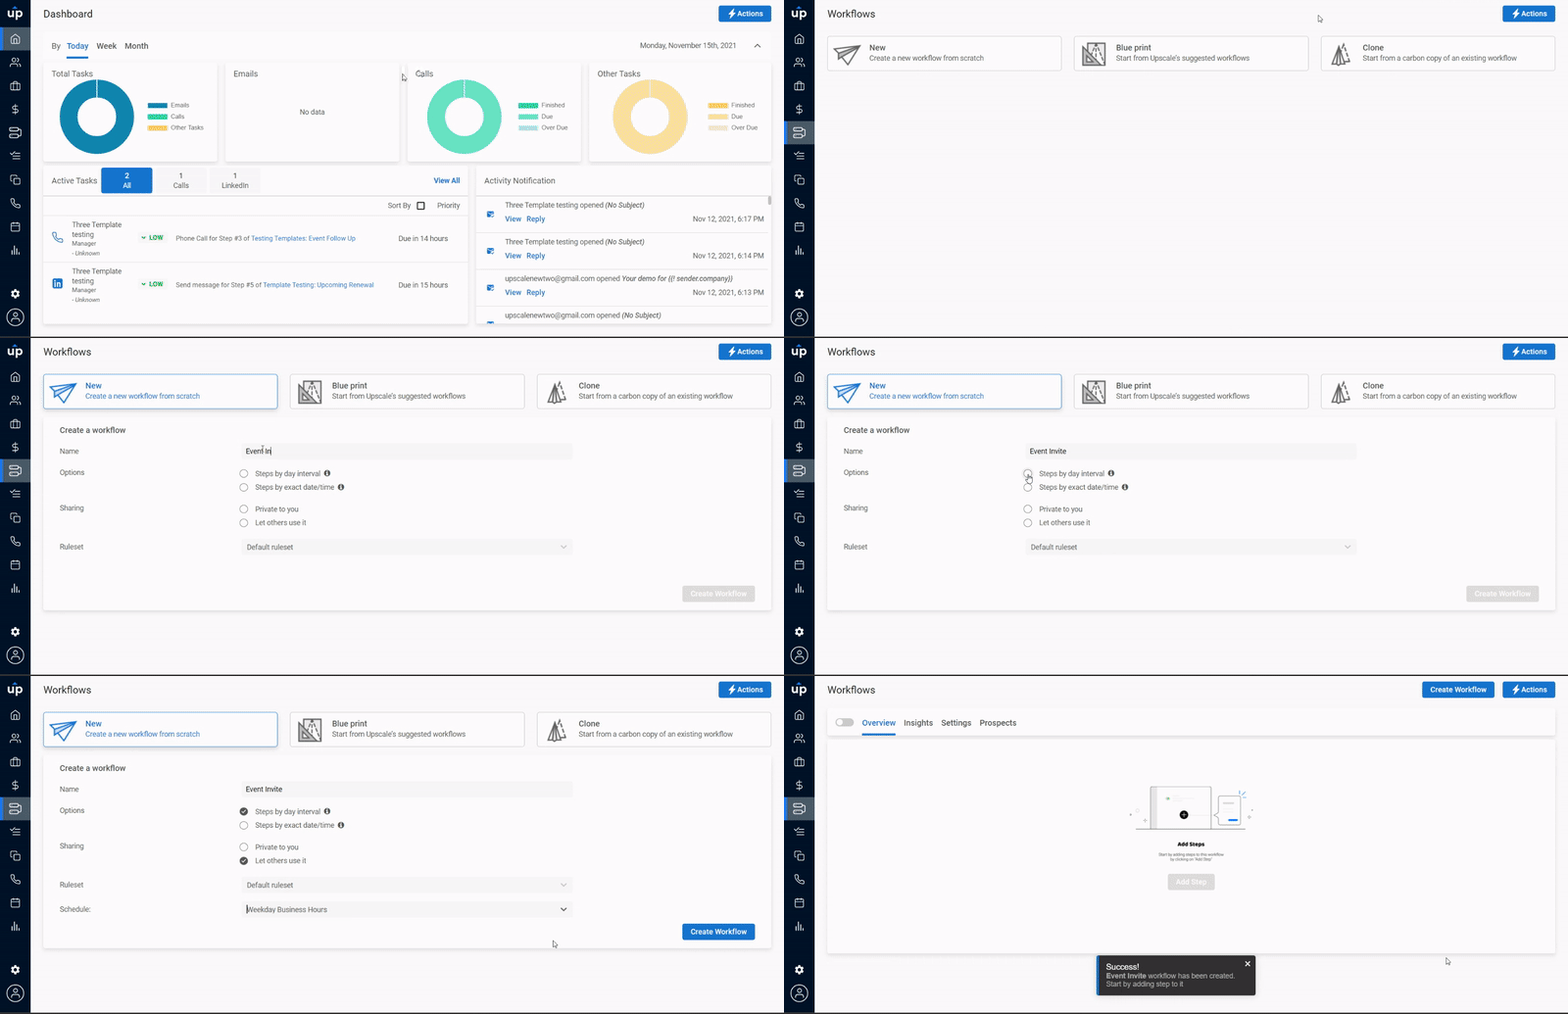
First you need to define your perfect customer and their needs. Having this base. Upscale can help you to build an extremely efficient workflow or campaign and turn your cold prospects into warm leads. To create a new workflow -
- Go to the Dashboard.
- Click on the Actions tab on the right.
- Select the Create Workflow option.
You can click on the Actions tab and create a workflow from any page. Alternatively, you can go to the workflow tab and select the create workflow CTA.
- Click on the New option.

- Give your workflow a name
- Select the type of workflow you want to create
| Workflow type | Description |
| Workflow by day interval | Use when you have recurring campaigns defined by time intervals |
| Workflow by exact date/time | Use for one-time campaigns which run on specific date and time |
- Define sharing setting for your workflow
| Sharing | Description |
| Private to you | Only the owner of the workflow can view and use it |
| Let others use it | Workflow can be used by everyone in the organisation |
- By default, default ruleset and schedule are applied while creating a workflow. If you wish to apply any other workflow, you can select it from the dropdown as per your requirements.
- Click on Create Workflow CTA.
As a next step, you have to define the framework of your workflow. This framework is a sequence of steps you want to execute on any prospect.
After creating the framework, it's time to add steps that you want to perform. You can perform various kind of tasks via a workflow -
- Emails - Auto or Manual
- Phone Call
- LinkedIn task
- View a profile
- Send connection request
- Send message
- Send InMail
- Generic Task
Here’s a quick guide to adding steps to your workflow:
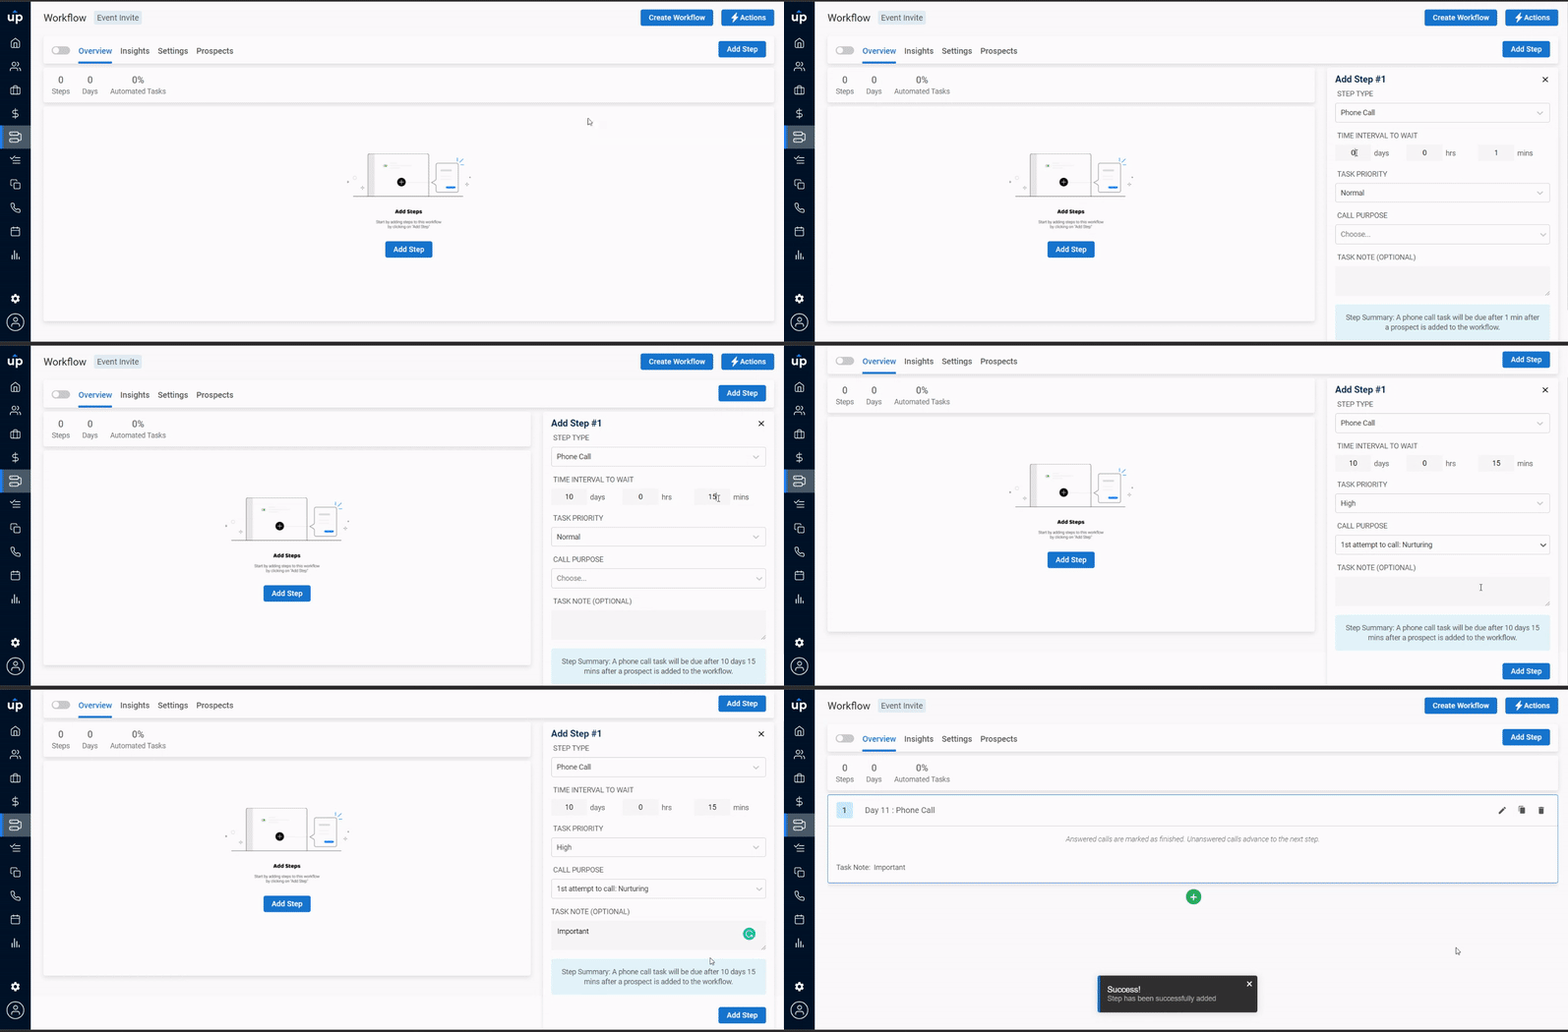
- Click on Add steps.
- In Add Step popup, select the step type.
- Customize the time interval to wait, task priority, and task notes for the step

- Click on Add step to save changes.
- For some types of step, you may need to provide additional information.
- For the email step, you have to compose the email to be sent. You can either write the email yourself or use an existing email template.
- For phone call step, you have to define the purpose of the call beforehand.
- For LinkedIn step (except view a profile), you have to compose the message or InMail to be sent.
- You can add further steps to the workflow by simply clicking on the plus sign or using add step button.
Your workflow is now complete! You can easily edit, delete or clone steps in your workflow to customize it according to your requirements.